Glypher
作者:rebot | 分类:模组
Minecraft 版本: 1.21.3 1.21.4
平台: fabric
Glypher
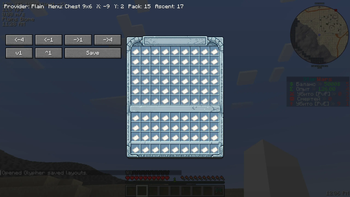
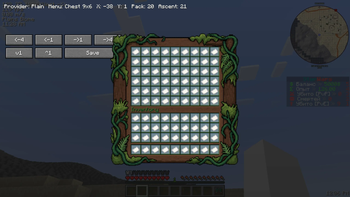
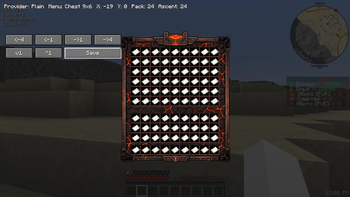
Glypher is a client-side Fabric mod for aligning custom menu title glyphs directly inside real vanilla Minecraft GUI previews.
Authors: LmVictor20 x ChatGPT
What Glypher Is For
Glypher helps you position a title glyph for menus such as chests, anvils, beacons, furnaces, hoppers, smithing tables, and more.
Instead of guessing offsets inside a JSON file, you can:
- choose the vanilla menu type;
- choose the resource-pack provider mode;
- enter the glyph used by your resource pack;
- preview the title inside the real GUI;
- adjust
XandY; - save the result as a small export file.
The goal of Glypher is not to replace your plugin config.
The goal is to make alignment easier, then export a readable result so you understand what values should go into your own pack or plugin configuration.
Supported Setup
- Minecraft
1.21.3 - Fabric Loader
- Fabric API
Installation
- Put the Glypher mod jar into your
modsfolder. - Enable the resource pack that contains your menu glyphs.
- Make sure your pack has a valid
assets/minecraft/font/default.json. - Start Minecraft.
- Run
/glypher create.
Before You Start
Glypher expects that your title glyph already exists in your active resource pack.
That means:
- if you use
Nexo/Oraxen, use the glyph already generated by that plugin's pack; - if you use
ItemsAdder, use the glyph already generated by that plugin's pack; - if you use
Plain, use the raw glyph that exists in your owndefault.json.
For the Glypher input field, the glyph should be taken from the generated resource pack default.json.
In other words, Glypher does not invent the glyph for you. It helps you align a glyph that already exists in your pack.
How Glypher Works
Step 1: Choose a menu
Run:
/glypher createThen choose the vanilla inventory/menu type you want to preview.
Step 2: Choose a provider mode
Glypher supports three output modes:
Nexo/OraxenItemsAdderPlain
This only changes how the final exported Title string is written.
Step 3: Enter the glyph
Type the glyph used by your resource pack.
This should be the actual glyph from your generated default.json, not a texture path, not a placeholder name, and not the image file name.
Step 4: Preview and align
Glypher opens a real menu preview and lets you move the title:
X offsetcontrols horizontal movement;Y offsetcontrols visual vertical movement in preview;Ascentis the value you will usually transfer into your font config.
Step 5: Save
When the title looks correct, press Save.
Glypher saves:
- the layout in its config;
- a text export file with:
IDProviderTitleAscent
Understanding Provider Modes
Nexo/Oraxen
Use this mode if your final menu title will be handled through Nexo or Oraxen syntax.
Export format:
<shift:(x)><glyph:menu_title>Example:
<shift:(-5)><glyph:menu_title>Important:
- Glypher internally handles the visual
X offsetin preview; - the exported result is only meant to show you the final offset structure;
- the plugin side should use the offset part and resolve the glyph through its own configuration;
- the actual glyph name or glyph binding is still defined by your Nexo/Oraxen setup.
So in provider mode, Glypher is helping you understand the offset and final structure, while your plugin remains responsible for the real glyph mapping.
ItemsAdder
Use this mode if your final menu title will be handled through ItemsAdder syntax.
Export format:
:offset_(x)::menu_title:Example:
:offset_(-5)::menu_title:Important:
- Glypher visually previews the shift internally;
- the exported line is a helper output for your ItemsAdder configuration workflow;
- the offset is what Glypher is really helping you find;
- the glyph itself should already come from the resource pack/config generated by ItemsAdder.
Plain
Use this mode if you are working directly with normal font providers and want the mod to compose the visible title string itself.
In Plain mode, Glypher works the old way:
- it builds the title using internal shift glyphs;
- it composes the final string directly;
- the exported
Titleis the literal string to use; - the preview uses the exact composed title text.
This is the best option if you are not using a plugin-side provider system and want full direct control over the raw font output.
Very Important Difference Between Provider Modes and Plain
For Nexo/Oraxen and ItemsAdder:
- Glypher should mainly be treated as an alignment helper;
- the plugin/provider system is still responsible for resolving the final glyph from its own config;
- Glypher output exists to make the offset and structure easier to understand.
For Plain:
- Glypher output is the actual final title string you can use directly.
Resource Pack Preparation
Your active resource pack must contain:
assets/minecraft/font/default.jsonIf the file already exists, merge your new providers into it instead of replacing it blindly.
Minimal structure:
MyPack/
  pack.mcmeta
  assets/
    minecraft/
      font/
        default.json
    mynamespace/
      textures/
        gui/
          title_example.png
Example Bitmap Provider
This is the kind of provider that usually defines the visible menu title glyph:
{
  "type": "bitmap",
  "file": "mynamespace:gui/title_example.png",
  "ascent": 24,
  "height": 256,
  "chars": [
    "\uE120"
  ]
}
The character in chars is the glyph you should copy into Glypher's input field.
Where The Input Glyph Comes From
When using Glypher, the glyph you type into the input field should come from the generated default.json inside the resource pack used by your plugin or your plain setup.
That means:
- open your generated pack;
- find
assets/minecraft/font/default.json; - locate the provider for your title glyph;
- copy the actual character from
chars; - use that character in Glypher.
How X Offset Works
In Plain mode
Glypher uses internal shift glyph composition and builds the final title string itself.
In Nexo/Oraxen and ItemsAdder mode
Glypher still lets you adjust the title visually, but the exported result is provider-style syntax.
That means the preview movement is internal, while the saved output is a clean provider-oriented title line.
How Y Offset / Ascent Works
Glypher previews vertical movement visually, then exports an Ascent value you can use in your font provider.
This is usually the number you will place into the matching bitmap provider inside default.json.
Example:
{
  "type": "bitmap",
  "file": "mynamespace:gui/title_example.png",
  "ascent": 24,
  "height": 256,
  "chars": [
    "\uE120"
  ]
}
Typical Workflow
- Generate or prepare your resource pack.
- Find the title glyph in
assets/minecraft/font/default.json. - Launch Minecraft with the pack enabled.
- Run
/glypher create. - Choose the menu type.
- Choose the provider mode.
- Paste or type the glyph from
default.json. - Adjust
XandYin preview. - Save the layout.
- Open the exported text file.
- Transfer the
TitleandAscentinto your own pack or plugin config.
Commands
/glypher create- create a new title layout/glypher list- open saved layouts
Saved Files
Glypher stores:
- layout data in
config/glypher/layouts.json - export files in
config/glypher/exports/
LmVictor20 x ChatGPT
请登录后举报
请 登录 后赞助作者。
暂无评论,抢个沙发吧~