![NotEnoughAuth [OAuth: Google, Discord, Telegram and more] 图标](https://cdn.modrinth.com/data/CbZqG1CH/df6e3d559fb54ade9fb0eca52bf63d9dc4c815ec_96.webp)
NotEnoughAuth [OAuth: Google, Discord, Telegram and more]
作者:rebot | 分类:模组
Minecraft 版本: 1.21.7 1.21.8 1.21.9 1.21.10 1.21.11 26.1 26.1.1 26.1.2
平台: paper purpur
标签: management social utility
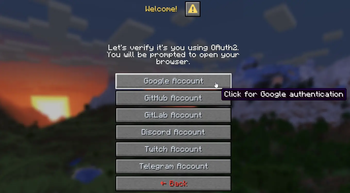
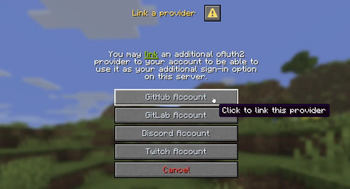
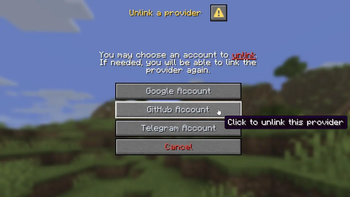
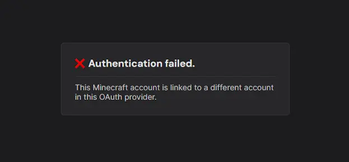
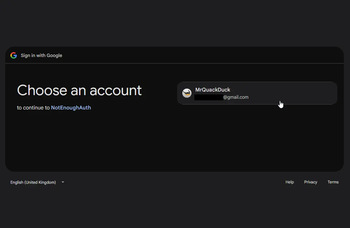
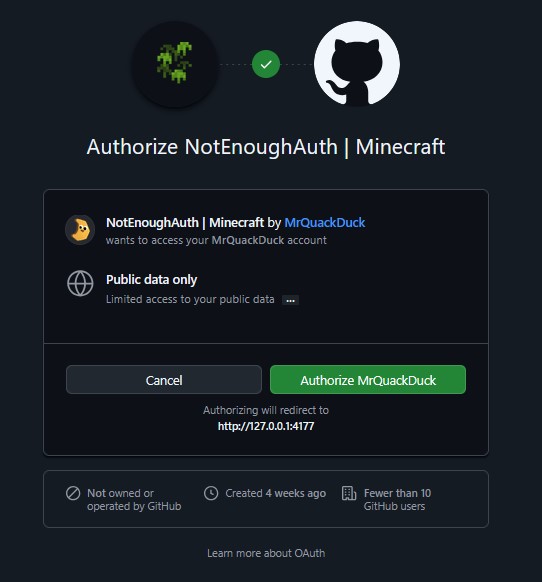
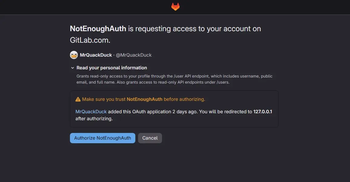
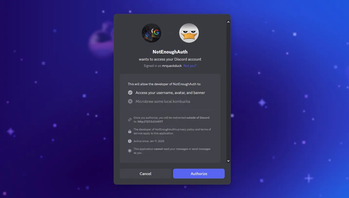
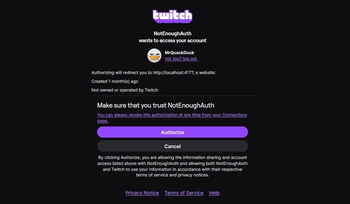
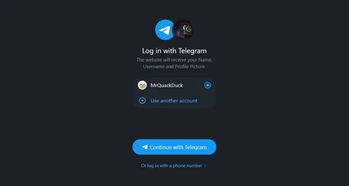
NotEnoughAuth is a Paper (1.21.7+) plugin that allows you to authenticate players using OAuth2 providers (Google, GitHub, GitLab, Discord, Twitch, Telegram) based on the Dialog functionality.
How to set up — scroll down to the ? Configuration section.
? Screenshots
While you authenticate, you will see the 'Joining world...' screen.
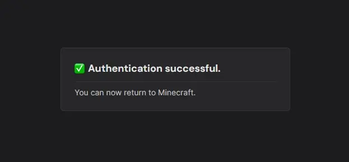
After successfully authenticating, you will be automatically redirected to the server after the 'Joining world...' screen.
? How it works?
Each player session has a hash describing the state of the client, and it is checked against the database (data.yml) each time a player joins.\
If sessions match - proceed to the server. If they don't, force the authentication.
The session hash is composed of multiple factors:
- IP address [[
Player.getClientAddress()](https://jd.papermc.io/paper/26.1.2/io/papermc/paper/connection/PlayerConnection.html#getClientAddress())] - View distance [
ClientOption.VIEW_DISTANCE] - Flag to allow server listings [
ClientOption.ALLOW_SERVER_LISTINGS] - Locale [
ClientOption.LOCALE] - Chat visibility [
ClientOption.CHAT_VISIBILITY] - Skins parts [
ClientOption.SKIN_PARTS]
? Commands
/link— opens a dialog to link an additional OAuth2 provider to your account./unlink— opens a dialog to unlink an OAuth2 provider from your account./logout— terminates your current session hash, requires authentication on next join./auth info— see a list of available commands./auth reload— reloads the plugin.
Aliases: /nea, /notenoughauth.
? Permissions
notenoughauth.admin(for operators by default) — Allows to use/auth reload.notenoughauth.default(true by default) — Allows to use the/auth infocommand.notenoughauth.link(true by default) — Allows to use the/linkcommand.notenoughauth.unlink(true by default) — Allows to use the/unlinkcommand.
? Default config
[CAUTION] Don't forget to put your public IP into the webIp field.
Also, you should open the TCP port on your machine for the plugin to work. Port 4177 by default.
Otherwise, nothing will work.
# After setting 'webIp' and 'webPort', take a look at the console output;
# You will see a list of OAuth2 redirect URLs - copy these and paste them into your OAuth provider settings (e.g., Google, GitHub) when creating the application credentials.
webIp: "127.0.0.1"
webPort: 4177

# Defines whether auth redirect links will contain "http" or "https";
# For example, if you use Nginx/Apache as a reverse proxy ('80' → '4177') and Cloudflare for SSL certificate, set this to 'true';
# For local testing, you may leave this as 'false'.
useHttps: false

# If you use tunneling software (such as 'playit.gg' or 'ngrok'), you may use this field for overriding the base URL (e.g., 'https://4be8-112-41-125-11.ngrok-free.app').
overriddenRedirectUrlBase: ""

# Time for a player to pass the auth process (in seconds).
timeout: 90

# Link for creating Google application: https://console.cloud.google.com/apis/credentials
google:
  enabled: true
  clientId: "YOUR_GOOGLE_CLIENT_ID"
  secret: "YOUR_GOOGLE_CLIENT_SECRET"

# Link for creating GitHub application: https://github.com/settings/developers
github:
  enabled: true
  clientId: "YOUR_GITHUB_CLIENT_ID"
  secret: "YOUR_GITHUB_CLIENT_SECRET"

# Link for creating GitLab application: https://gitlab.com/-/user_settings/applications
gitlab:
  enabled: true
  clientId: "YOUR_GITLAB_APPLICATION_ID"
  secret: "YOUR_GITLAB_SECRET"

# Link for creating Discord application: https://discord.com/developers/applications
discord:
  enabled: true
  clientId: "YOUR_DISCORD_CLIENT_ID"
  secret: "YOUR_DISCORD_CLIENT_SECRET"

# Link for creating Twitch application: https://dev.twitch.tv/console/apps/create
twitch:
  enabled: true
  clientId: "YOUR_TWITCH_CLIENT_ID"
  secret: "YOUR_TWITCH_CLIENT_SECRET"

# Link to Telegram documentation: https://core.telegram.org/bots/telegram-login#tldr
telegram:
  enabled: true
  clientId: "YOUR_TELEGRAM_BOT_CLIENT_ID"
  secret: "YOUR_TELEGRAM_BOT_CLIENT_SECRET"

messages:
  "prefix": "&#C8D1DE[NotEnoughAuth]"
  "auth-required": "&fAuthentication required to join this server."
  "title": "&#FFDB60Welcome!"
  "description": "Let's verify it's you using OAuth2.\nYou will be prompted to open your browser."
  "google": "&#D5DEEAGoogle Account"
  "google-hover": "Click for Google authentication"
  "github": "&#D5DEEAGitHub Account"
  "github-hover": "Click for GitHub authentication"
  "gitlab": "&#D5DEEAGitLab Account"
  "gitlab-hover": "Click for GitLab authentication"
  "discord": "&#D5DEEADiscord Account"
  "discord-hover": "Click for Discord authentication"
  "twitch": "&#D5DEEATwitch Account"
  "twitch-hover": "Click for Twitch authentication"
  "telegram": "&#D5DEEATelegram Account"
  "telegram-hover": "Click for Telegram authentication"
  "auth-success": "Authentication successful."
  "auth-success-description": "You can now return to Minecraft."
  "auth-failed": "Authentication failed."
  "account-mismatch": "This Minecraft account is linked to a different account in this OAuth provider."
  "provider-mismatch": "This provider isn't linked to this player's account."
  "invalid-state": "Invalid or expired state. Please try again."
  "timeout": "Timeout."
  "link-title": "&#FFDB60Link a provider"
  "link-description": "You may &#A4D400&nlink&r an additional oAuth2 provider to your account to be able to use it as your additional sign-in option on this server."
  "link-hover": "Click to link this provider"
  "unlink-title": "&#FFDB60Unlink a provider"
  "unlink-description": "You may choose an account to &#EB4C42&nunlink&r. If needed, you will be able to link the provider again."
  "unlink-hover": "Click to unlink this provider"
  "unlink-confirm-title": "&#FFDB60Are you sure?"
  "unlink-confirm-description": "This provider will be removed from your account."
  "confirm-unlink": "&#E74C3CConfirm Unlink"
  "confirm-unlink-hover": "Permanently unlink this provider"
  "confirm": "&#A4D400Confirm"
  "cancel": "&#EB4C42Cancel"
  "back": "&#EB4C42← Back"
  "back-hover": "Go back to server list"
  "info-header": "<prefix> &#ECF4FBCommands:"
  "info-link": "\n &#D8E5EC&n/link&r&#ECF4FB - link an additional provider to your account."
  "info-unlink": "\n &#D8E5EC&n/unlink&r&#ECF4FB - unlink one of the providers from your account."
  "info-logout": "\n &#D8E5EC&n/logout&r&#ECF4FB - sign out of the account."
  "info-reload": "\n &#D8E5EC&n/auth reload&r&#ECF4FB - reload the plugin configuration."
  "successfully-linked": "<prefix> &#A4D400Linked successfully!"
  "successfully-unlinked": "<prefix> &#A4D400Unlinked successfully!"
  "provider-linked": "Provider linked successfully!"
  "logged-out": "&fYou've successfully logged out."
  "reloaded": "<prefix> &#ECF4FBReloaded!"
  "disconnected": "Disconnected."
  "command-not-found": "<prefix> &#E03E3EOops! That command doesn't exist, or you don't have enough permissions."
  "not-enough-permissions": "<prefix> &#E03E3ENot enough permissions."
  "one-provider-left": "<prefix> &#E03E3EYou have only one provider left linked to your account."
  "all-providers-already-linked": "<prefix> &#ECF4FBYou've already linked all possible providers to your account!"
  "rejoin": "<prefix> &#E03E3ESession hashes don't match. Please rejoin."
  "an-error-occurred": "<prefix> &#E03E3EAn error occurred during reload! Check the console logs for details."
? Installation
[IMPORTANT] Before getting started, make sure that the plugin's version is compatible with your server version.
- Download the latest version of the plugin from the Releases tab.
- Put the downloaded
.jarinto the/pluginsfolder of your server. - Restart your server or enter the
/reloadcommand.
? Configuration
[CAUTION] Never share your client secrets, bot tokens, or any other credentials shown in your config.yml. Anyone with access to these can impersonate your application.\
All credentials visible in the screenshots throughout the guide have been revoked and are no longer valid.
Prerequisites:
- Make sure to put your server's public IP into the
webIpfield inconfig.yml. - Open a TCP port (4177 by default) on your server equal to the
webPortfield from theconfig.yml.
How to configure specific providers:
 Google
1. Follow the link to open Google Cloud Console: https://console.cloud.google.com/apis/credentials
1. Create a project:
Google
1. Follow the link to open Google Cloud Console: https://console.cloud.google.com/apis/credentials
1. Create a project:  GitHub
1. Follow the link to open GitHub Developer Settings: https://github.com/settings/developers
1. Click **"New OAuth App"**:
GitHub
1. Follow the link to open GitHub Developer Settings: https://github.com/settings/developers
1. Click **"New OAuth App"**:  GitLab
1. Follow the link to open GitLab User Application Settings: https://gitlab.com/-/user_settings/applications
1. Click **"Add new application"**:
GitLab
1. Follow the link to open GitLab User Application Settings: https://gitlab.com/-/user_settings/applications
1. Click **"Add new application"**:  Discord
1. Follow the link to open the Discord Developer Portal: https://discord.com/developers/applications
1. Click **"New Application"**, enter a name for your application, and click **"Create"**:
Discord
1. Follow the link to open the Discord Developer Portal: https://discord.com/developers/applications
1. Click **"New Application"**, enter a name for your application, and click **"Create"**:  Twitch
1. Follow the link to open the Twitch Developer Console: https://dev.twitch.tv/console/apps/create
1. Enter `/auth reload` and copy the link for Twitch callback _(before that, make sure to populate `webIp` in the configuration with your server public IP or domain)_:
Twitch
1. Follow the link to open the Twitch Developer Console: https://dev.twitch.tv/console/apps/create
1. Enter `/auth reload` and copy the link for Twitch callback _(before that, make sure to populate `webIp` in the configuration with your server public IP or domain)_:  Telegram
1. Open Telegram and start a chat with **@BotFather**: https://t.me/BotFather
1. Open the **@BotFather** Mini App, click **"Create a New Bot"** and proceed with the form:
Telegram
1. Open Telegram and start a chat with **@BotFather**: https://t.me/BotFather
1. Open the **@BotFather** Mini App, click **"Create a New Bot"** and proceed with the form: ? SSL certificates and HTTPS
[NOTE] If you don't own a domain, tunneling software like ngrok or playit.gg can also provide an HTTPS URL - use the overriddenRedirectUrlBase field in config.yml for that.
Some OAuth2 providers require you to own a domain, and in some cases, an SSL certificate (i.e., to use 'https').
You can purchase a domain at websites such as Cloudflare, Spaceship.\
Domain price comparison tool and aggregator - https://tld-list.com/.
Table of OAuth2 providers and their agility:
| Provider | Can use without a private domain | Can use without SSL (HTTPS) |
|---|---|---|
|  Google | ❌ | ✅ |
| GitHub | ✅ | ✅ |
| GitLab | ✅ | ✅ |
| Discord | ✅ | ✅ |
| Twitch | ❌ | ❌ |
| Telegram | ✅ | ✅ |
请登录后举报
暂无评论,抢个沙发吧~