
Cinematic Cherry Panorama
作者:rebot | 分类:资源包
Minecraft 版本: 1.13 1.13.1 1.13.2 1.14 1.14.1 1.14.2 1.14.3 1.14.4 1.15 1.15.1 1.15.2 1.16 1.16.1 1.16.2 1.16.3 1.16.4 1.16.5 1.17 1.17.1 1.18 1.18.1 1.18.2 1.19 1.19.1 1.19.2 1.19.3 1.19.4 1.20 1.20.1 1.20.2 1.20.3 1.20.4 1.20.5 1.20.6 1.21 1.21.1 1.21.2 1.21.3 1.21.4 1.21.5 1.21.6 1.21.7 1.21.8 1.21.9 1.21.10
平台: minecraft
标签: gui modded tweaks

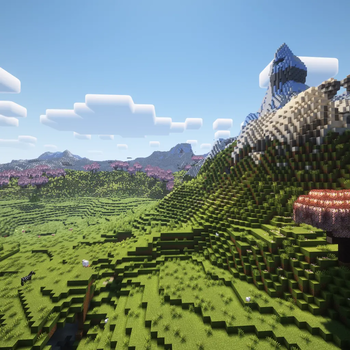
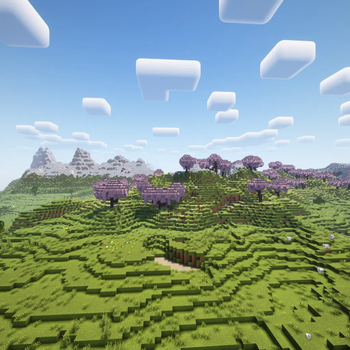
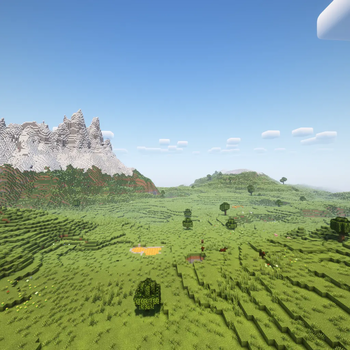
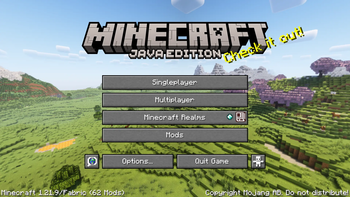
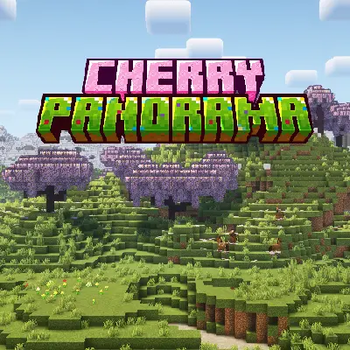

Information
- Shaderpack: Rethinking Voxels & Iris Shaders
- World Seed: -7323051237561229001
- Coordinates: 40 ~ 1181
- Version: 1.21.9
Installation
Click the download button and choose the correct Minecraft version
Launch your Minecraft instance and go to Options, then click the Resource Packs option. Click the button reading Open Pack Folder.
Grab the downloaded file and put it in your \minecraft\resourcepacks\ folder. Select the pack in-game and hit Done. Ta-da! You're done!
How can I make one myself?
To make a custom panorama pack for yourself, you will probably first want a template pack. You can download mine and edit the contents to your liking.
Setting up the Pack
If using a template pack - Extract the `.zip` file into a new folder. I recommend you put it into a folder as the extracted files can easily be lost. - Open `\assets\minecraft\textures\gui\title\background\` and you will see all 6 images labeled `panorama_0.png`, `panorama_1.png`, `panorama_2.png`, `panorama_3.png`, `panorama_4.png`, and `panorama_5.png`. - Delete all 6 of these `.png` files. If not using a template pack - Create a new folder named `assets`, and 5 more folders that will go inside. The final folder's file directory should look like this: ``` assets/ └─ minecraft/ └─ textures/ └─ gui/ └─ title/ └─ background ``` - Create a `pack.mcmeta` file that will go in the final `.zip` alongside `assets` - This `pack.mcmeta`'s contents should consist of: ``` { "pack": { "description": "Custom Panorama", "pack_format": 34 } } ``` `"pack_format": 34`Getting the Images
-
Create a fresh Minecraft instance on Minecraft (Java) version 1.21.9+ (I do not recommend doing this on an existing instance as it uses debug features added in 1.21.9 that are experimental.)
-
Add these Java arguments to your launcher:
-DMC_DEBUG_ENABLED -DMC_DEBUG_PANORAMA_SCREENSHOT -
In the official Minecraft Launcher, go to Installations -> [Your Version] -> Edit -> More Options, and paste the arguments into the JVM Arguments field, before any existing text. If you're using MultiMC or Prism Launcher, edit the instance settings and add them under Java -> JVM Arguments.
-
Launch your instance, and open the world you would like to use.
-
Click
Ctrl + F2. If you are in the air, I recommend you holdSpaceas well to prevent moving downwards. -
After pressing Ctrl + F2, Minecraft will display a chat message like "Saved screenshot as ...". Click the underlined text to open the screenshots folder inside your Minecraft instance directory. You should find six images named panorama_0.png through panorama_5.png. Drag and drop these into the
background/folder you created earlier.If you don’t see all six images, make sure the JVM arguments were added properly and that you pressed
Ctrl + F2. You might need to relaunch the world and try again.
Finishing your Pack
- Right-click and compress your
pack.mcmeta,assets, and your (optional)pack.pngfiles into a.zipfile with any name you desire. You can use this pack for personal use, or share it with others!Make sure you zip the contents (not the folder containing them) so that pack.mcmeta is at the root of the .zip, not inside another subfolder.
The pack itself took me ~30 minutes to make. On the other hand, making the description took me around 1 ½ hours 😭
请登录后举报
请 登录 后赞助作者。
暂无评论,抢个沙发吧~